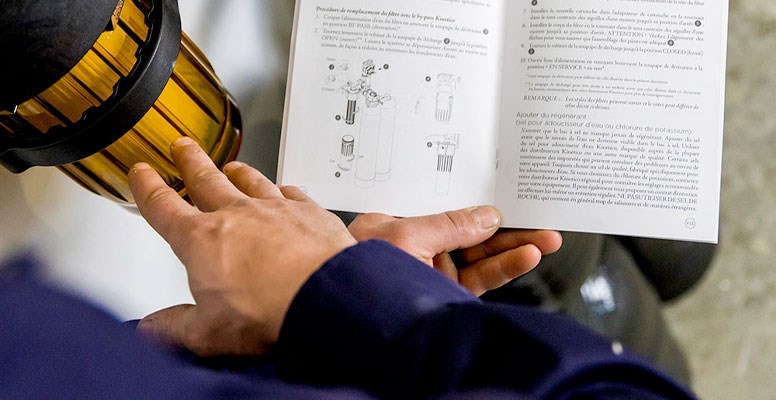
How To Change Your Kinetico Water Softener Prefilter
Learn the best practices to maintain your Kinetico Water Softener’s performance.
Kinetico water systems simply and reliably provide you with great water quality, but some require routine maintenance to keep them performing optimally. To ensure proper operation of your Kinetico water softener, change the softener’s prefilter regularly. A prefilter will keep sediment and any other solid material in your water supply from entering your Kinetico water softener. Here’s how to change the prefilter.
Contact Your Local Kinetico Water Expert for Water Softener Service
How to Change Your Water Softener's Prefilter
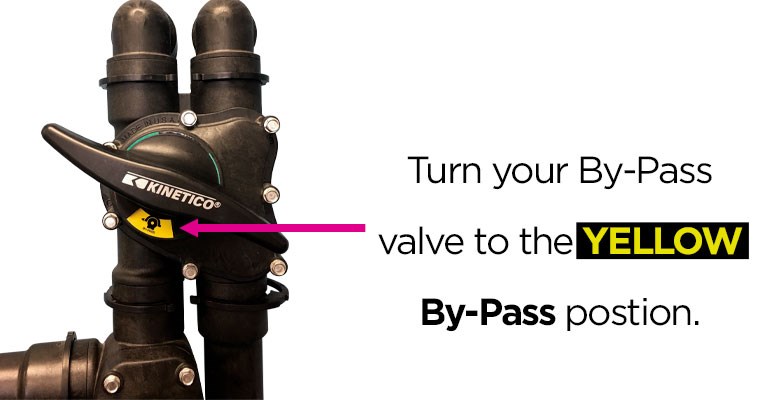
Step 1: Put your water softener in by-pass
Locate the by-pass valve installed with your water softener. When in service, your Kinetico by-pass should show a green section in the opening of the dial. Turn the handle of the by-pass valve so the dial shows the yellow section in the opening. Your system is now in the by-pass position. Note: there are many by-pass valve styles. Yours may not be as described here.
Step 2: Set up to Depressurize System
The second step is to locate the 3/8” plastic tubing coming from the by-pass/prefilter Superkit. If this tubing does not run to a drain, be sure to place a bucket or receptacle underneath it to catch any water. Note: Even if you have a Kinetico Superkit, you may not have the described tubing. If not, proceed to step 4.
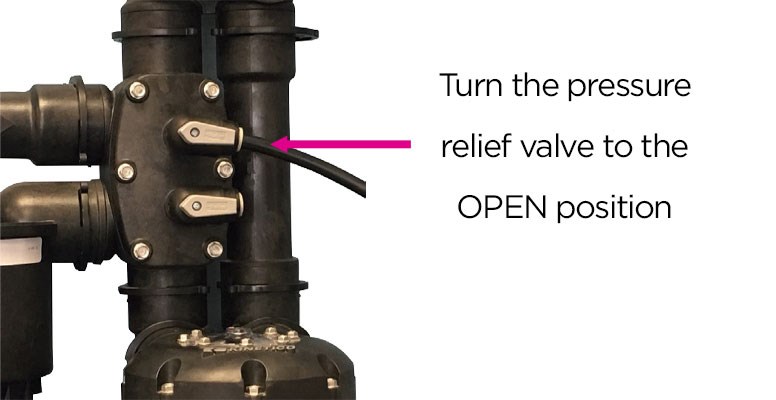
Step 3: Depressurize the water softener and prefilter
Locate the 3/8" valves, located at the head of the prefilter and near the water softener connector tubes that join the water softener to the pipes. Turn the valves to the open position to depressurize your system. Keep the valves in the open position. This should reduce water spillage and make it easier for you to turn the filter housing. Wait at least one minute before proceeding.
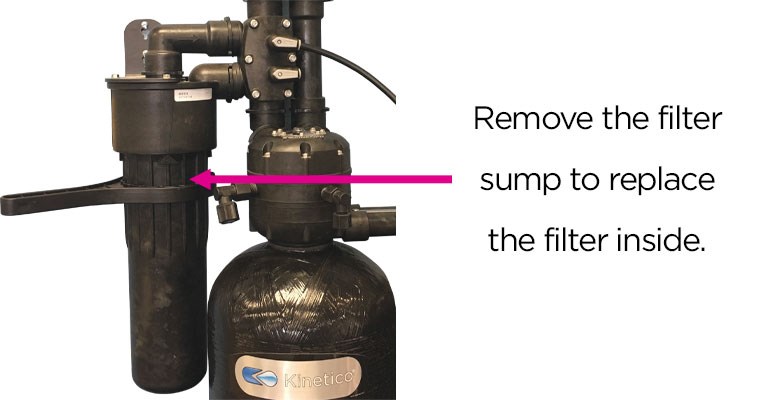
Step 4: Remove the filter sump
After your system has depressurized for a minute or longer, remove your filter housing sump by turning it clockwise with two hands (when viewed from above). This may take some effort if you do not have the valves and tubing to depressurize your system and the housing is tightly sealed. Some dealers offer a sump removal wrench to make it easier. Take care as the housing sump will be full of water.
Step 5: Remove the used filter cartridge
After the housing is removed, turn the filter cartridge clockwise to remove it (when viewed from above). Once removed, discard the filter cartridge. If it is a reusable filter cartridge, thoroughly rinse the cartridge with clean running water until it looks clean, or by soaking it in a solution of water and Iron Out, or whatever your authorized, independent Kinetico dealer recommends. When dry, store the reusable cartridge for future use.
Step 6: Inspect and clean your sump
After discarding the water in the sump housing, look inside and see if sediment or anything has collected at the bottom. Clean the sump, if needed. Before you insert a new or clean cartridge, check to see if your sump’s seal and O-ring are in good condition. If necessary, lubricate the O-ring at the top of the housing with a silicone lubricant. Do not use petroleum jelly or any other lubricant as it will void your warranty. Contact your dealer for an appropriate lubricant, if needed.
Step 7: Install the new or clean filter cartridge
To install the new filter cartridge, insert it into the top of the filter housing, and turn it counter-clockwise until it stops turning.
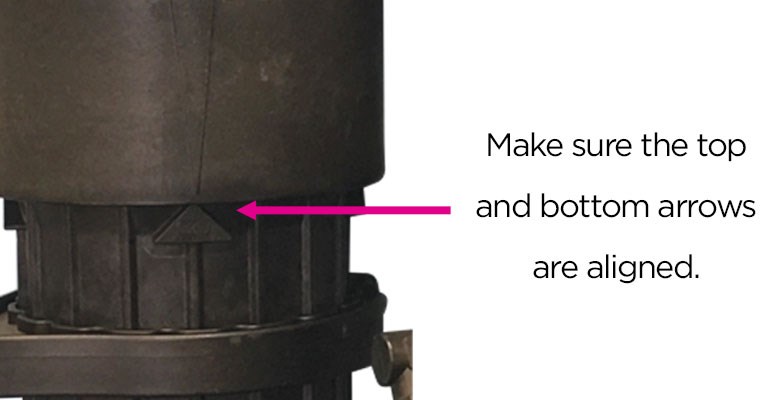
Step 8: Install the filter sump
After inserting the filter cartridge, place the filter housing over the filter cartridge, lining up the threads and turning the housing counter-clockwise until it seals. Note: For proper alignment, be sure the arrow on the head of the filter sump aligns with the arrow on the filter housing.
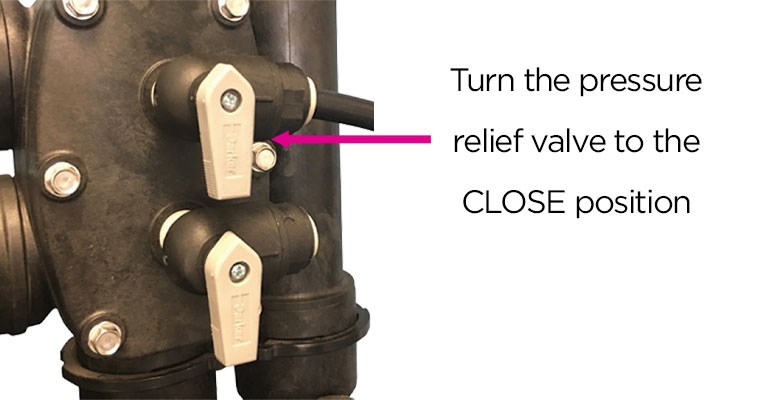
Step 9: Close the 3/8" Valves
Return to the two valves (at the softener connector pipes and the filter head) and turn them to the closed position.
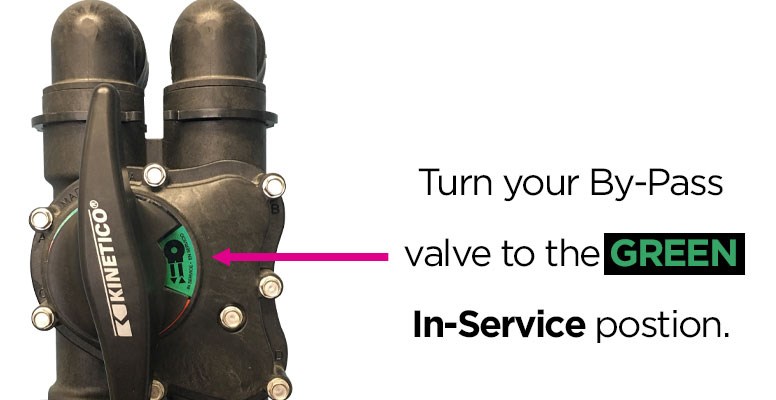
Step 10: Set your by-pass to “in-service”
Return to the by-pass valve and turn the handle until the green section shows on the dial. The system is now in the “service” position. Be sure to check your prefilter for a leak. If you notice water dripping from the housing, you may need to further tighten the filter housing, or something could be preventing the housing from sealing properly. Check that the filter cartridge is firmly in place, and that the O-ring is not obstructing the seal.
Learn more about Kinetico Water Softeners
You have now successfully changed your water softener’s prefilter. Replacing your prefilter regularly will help protect your Kinetico Water Softener.
NOTE: Your installation may not appear as we’ve described here. Installations vary by home, equipment installed and dealer. Some Kinetico systems have prefiltration built into the water softening system. If you have questions about your system or need assistance, please contact your Authorized, Independent Kinetico Dealer.
Contact a Kinetico Water Expert for Help With Your Water Softener